Hello everyone! It's Bonnie Irvine here with a tag to share today. We have had such lovely warm weather that my plants are finally starting to do exciting things in the garden. The Bachelor's Buttons are budding and almost ready to pop and since I love their beautiful blue flowers that makes me very happy. One of my other favourite flowers, the poppies, are gaining in height but will keep me waiting a while longer for the stunning blooms. So...I decided to create my own :)
I started out with a #10 manila tag (4.5 x 8.5") and applied dictionary text paper from the Authentique Renew Collection to the tag. Another piece of dotted paper from the same paper pad was torn and adhered across the bottom after being inked with Vintage Photo Distress ink. Interest was added to these backgrounds by applying Peacock Feathers DI over Christy Tomlinson's Vintage Lace stencil and Black Soot over TCW's Min Chevron stencil. The edges of the text paper were inked with Peacock Feathers DI and Vintage Photo DI was scuffed here and there to grunge up the middle.
Donna Downey's Wild Poppy Silhouette stamp from Unity was stamped twice with Tuxedo Black Memento ink: once on the tag itself and once on another piece of the Renew paper focusing on the flower heads only. The second set of flowers was fussy cut and then sculpted with a large ball stylus to create dimension and shape. The bottom of each flower was glued directly to the stamped tag but the middle and ends of the petals were popped up on several layers of foam dots. White gesso was pounced through the TCW Mini Punchinella stencil with a scruffy brush over the background and onto the poppy silhouettes. White Gelato was used to highlight the tips of the petals.
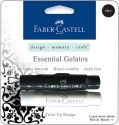
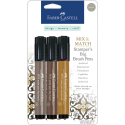
Now this was one of those mixed media pieces that had to go through Seven Stages of Ugly before I started to like it...you know the ones where you keep eyeing the garbage can and nudging it a little closer with your foot after each step :) A Bo Bunny letter cancellation stamp was applied using Tuxedo Black ink. Blueberry, Cotton Candy, and Grape Gelatos were scuffed here and there and then spread with a wet finger or a wet brush. Black and Brown Big Brush pens were used to outline the edges of the tag and doodling was added with a black Micron pen. Brown shading was applied next to the flowers and stems with an Inktense pencil and then spread with a wet brush.
Not there yet! Hmmm, three short lengths of black and white dotty ribbon were stapled to the sides of the tag with a Tiny Attacher. Maya Road canvas butterflies were sprayed with fresh Lime and Vibrant Turquoise Dylusions inks, dotted with teal paint, and given key bodies. Glossy Accents was applied over each flower and allowed to dry. Getting closer... a black piece of cardstock was adhered to the back of the tag to frame it. A reinforcement was inked with Black Alcohol ink and applied around the hole. And finally, some wired turquoise ribbon was fed through the hole and tied with Idea-ology Tinsel Twine. Phew...I think I like it!
The final step was to add Idea-ology letters spelling out poppy. White paint pen dots were added to the letters both to continue the dot theme and to help them stand out. It also took away from the plain appearance. Cotton Candy Gelato was applied with a wet brush to the inside letter openings. This tag served as a good reminder to me to keep on going even when I wasn't thrilled with the results. Again, it's that ol' "Trust The Process" thing that often happens with mixed media.
Anyway, thanks for the company today. We love it when you visit!
Bonnie
To check out the products I used on this tag, click on the thumbnails below to arrive at the listing at the eclectic Paperie store.







This comment has been removed by the author.
ReplyDeleteDo the math: 7 Stages of Ugly = 1 Masterpiece
ReplyDeleteLove the color and the repetition of the dot theme.
Thanks for explaining your step by step process.
Beautiful tag ! Love the colour, papers,image .technique.....
ReplyDeleteEverything!!, so glad the bin did n't win x
Stunning tag Bonnie - love how you have pieced / rounded the poppies - amazing pop effect! Nicola x
ReplyDeleteGreat tag , love the colors.
ReplyDeleteStunning, Bonnie! This is just beautiful! The black embossing paste is amazing and I love the tiny white dots, the text background...it's all just perfect together!
ReplyDeleteSo, so pretty!!!
ReplyDeleteThose popped-up poppies are brilliant. Love the dimension of this beautiful tag.
ReplyDeleteLove It!
ReplyDeleteBrilliantly done, love the effects on this tag. Hugs Frea
ReplyDeleteSo glad you saved it! I think it is stunning, love the blues and the DD flowers. An amazing tag and great details. Hugs, Anne x
ReplyDeleteLove your tags awesome colors.
ReplyDeleteIt was worth all those steps Bonnie girl. I especially like the way you gave the flowers dimension. Amazing tag!
ReplyDeleteLOVE it. I really like how you colored the tag. Reminds me of those blue/white dishes (plates) my grandmother collected. Gorgeous.
ReplyDeleteWow!! Fab colors!!! Don't you just love when a project comes together so easily LOL
ReplyDeleteYou worked it to perfection :-)
Absolutely astounding, Bonnie - the vibrancy of the colour is breathtaking... gorgeous use of the stamps!
ReplyDeleteAlison xx
Awesome tag, Bonnie! The depth of the colors and the patterns are amazing!
ReplyDeleteBonnie, your tag is beautiful!!! Poppies are one of my favorite flowers, and you have totally done them justice! What you have created is AMAZING!!!!
ReplyDeleteBonnie, this is so beautiful! I love the way you sculpted the flowers with your stylus and of course you know I love all the inking and stenciling. A real beauty!
ReplyDeleteBonnie I am sitting here blown away by this...the flowers are a true work of art!!
ReplyDeleteBig hugs
Tracy
xoxox