Hello! Annette Green here today with a fun and easy home decor project you can finish in an afternoon made with all kinds of great products you can find right here in the eP store. Just click on those linkies at the end of this post and they will take you there.
My USA banner pays tribute to our fine country and can be displayed during the summer season from Memorial Day to 4th of July all the way through Labor Day. Or if you are a die-hard Americana fan, all year round.
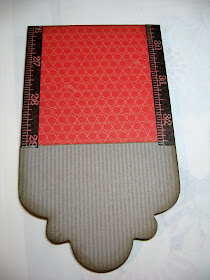
It all starts with a 3-pack of these Scallop Tags with Trim (Art Parts by Wendy Vecchi). I decided to switch things up a bit and flip them over the other way.
I covered each with papers from Little Yellow Bicycle's "Just Because" line (perfect with all its reds, whites and blues) then added some tissue tape along the sides. Then inked them with Vintage Photo to darken the bright colors a little, then inked with Walnut Stain around the outer edges.
I ran some white chipboard coasters through the new Pediments die by Tim Holtz, then gave them an aged look by first applying Tarnished Brass Distress Paint to the surfaces, dried them well, then a layer of Walnut Stain Distress Paint which I quickly spritzed with water and mopped up with a balled up paper towel to create texture. After that was dry, I inked the edges with Black Soot Distress Ink.
I used Tim's Mini Paper Rosettes die to create three small rosettes from more of the "Just Because" paper. Even though the paper is only 6 x 6, there's no reason why you can cut two strips and piece them together to fit the die. I inked their edges with Walnut Stain Distress Ink.
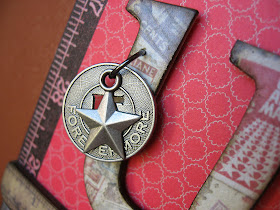
I grabbed some old chipboard letters and covered them with some of the new Collage Mini Stash papers from Tim Holtz. This is the postage stamp page. After sanding to clean up the edges, I inked with Walnut Stain Distress Ink.
Now for assembly. Papers go down first, then tissue tape, then the embellishments.
Several Idea-ology pieces adorn each letter.
I connected each tag with chain from Tim's swivel clasps and then added a full swivel clasp to each end for hanging on the wall.
Hanging from the bottom of the middle tag is one of the new Collage Keys from Tim Holtz (also hanging from one of the swivel clasps). I love these Collage Keys! They come with several vintage images on stickers or you can put your own thing inside. A clear epoxy bubble seals it.
Incidentally, a Crop-a-dile works just dandy through the thick paperboard tags to make the holes.
This accent on each tag is also part of the Scallop Tags with Trim set. I've covered them with the ruler paper from the Collage Mini Stash collection, sanded it smooth and inked the edges with Walnut Stain Distress Ink.
That's it for me today. Thanks for popping by to check it out. Have a wonderful weekend!


Annette I don't know were to start...except to say
ReplyDelete"AWESOME PATRIOTIC BANNER"
All the materials you have taken work beautifully together...looove it!!
Hugs
Tracy xxcc
What a wonderful and patriotic banner Annette. This is beautiful, I really love how you used the WV art parts and also Tim's pediment looks amazing. A great idea and such wonderful inspiration - thank you!
ReplyDeleteVery inspiring make Annette. Certainly got ideas from this.
ReplyDeleteAnnie x
What a great project, Annette! I love all of the embellishments and the pediments are the perfect addition to each banner! Great stuff!
ReplyDeleteWonderful banner. Great idea to turn the tags upside down. The pediments looks fabulous.
ReplyDeleteAnnette, this is so cool! Your out-of-the-box thinking always inspires me. Love all of the metal bits and bobs, the shape of the tags with the pediments, and the gorgeous papers. Wow!
ReplyDeletetotally flippin GREAT idea!
ReplyDeleteFab banner... and the pediments look so totally brilliant!
ReplyDeleteAlison x
Fabulous banner.
ReplyDeleteRegards diane
Amzing banner,,,,,love every detail here and thanks for posting my little reader digi also in your blog,, Alison did a great work with my digi.Thanks for your comments at Alison blog about my little reader digi,,,so feel free to choose any product from my store for free…. email me to nicecrane@yahoo.com
ReplyDeletewow Annette this is awesome! I love how you finished the pieces cut with the pediments die. The whole project is completely fabulous with all of the embellishments and awesome idea to turn the tags around to start with.
ReplyDeleteAnnette - this is perfect for my front door!!! I love it. I could also hang this from my mantel! Perfect inspiration for any home!
ReplyDelete