Photobucket Photobucket Photobucket Photobucket Photobucket Photobucket

Thursday, January 31, 2013

Sew easy...

Hello all, Alison here!  I'm so happy to be back with you to share another project, a jumbo shabby chic tag this time.  This is a great way to use up paper scraps, but also to use several of the papers in a collection.  If you're like me, then it's sometimes hard to crack in to a new pad, since they all look so beautiful in there together... this way you get to see them together but in use on a project!


I cut myself a large size tag (8.5 by 4.25 inches) and selected the papers I wanted to use from the Farmhouse Collection 6 x 6 pad, Fair Skies.  I had some pieces left over from a previous project, and I added a couple of new pages into the mix too.


First step was to cut them to size, varying heights but all the width of the tag, and then I spent some time shuffling them about until I was pleased with the arrangement before sticking them all down.


I did some fairly hefty sanding at this point... I love the worn look you can achieve with something as simple as some sandpaper.


Next was a light whitewash for a further shabby chic effect.  


I usually just dot some paint onto my craft mat and add a good spritz of water and apply the wash direct from there.


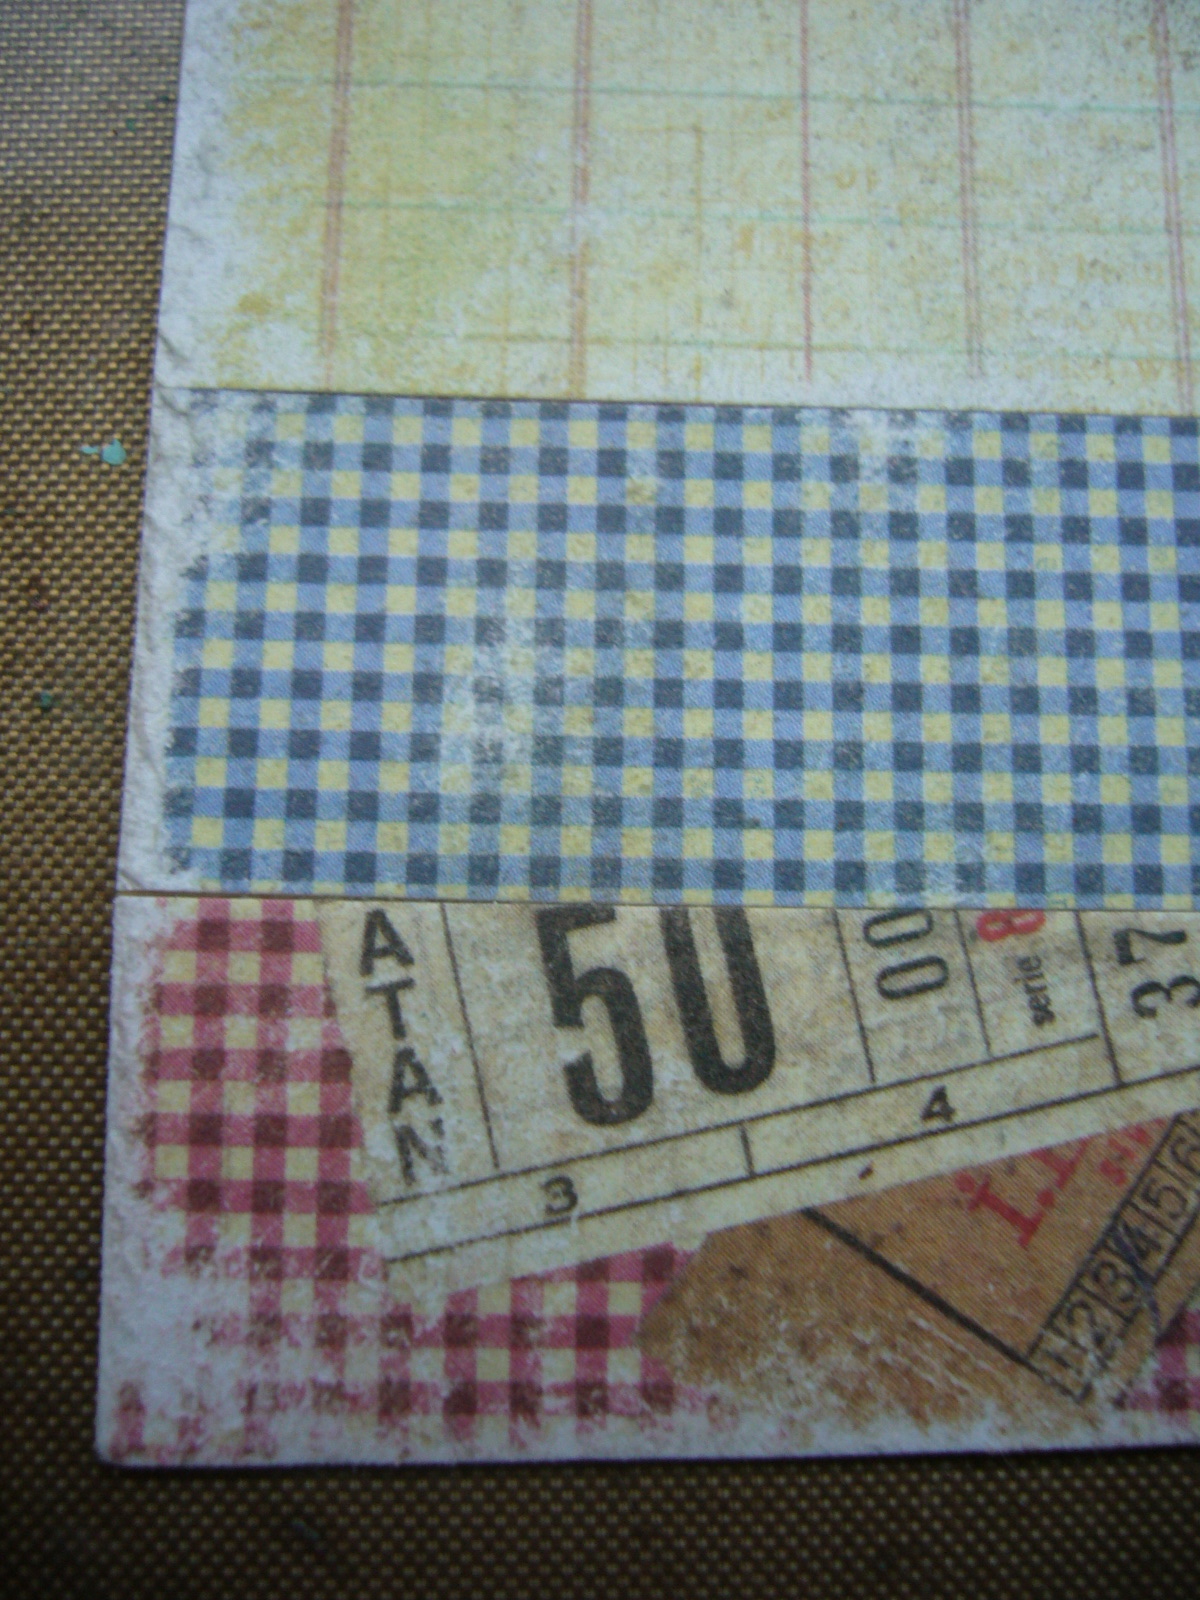
Then it was time to add some stamping texture... always a magical moment for me when the stamps come out.  This tag uses the gorgeous Wendy Vecchi set Art By Hand.  The sewing labels and advertisements make great background images, adding some extra interest.  They're stamped in Archival ink - in case I decide to do another coat of shabbiness!


I love altering the Tim Holtz AlphaParts.  These start out as black plastic, but you can paint, ink and alcohol ink them for various effects.  I usually paint mine on a spare bit of card, so that I can easily move them out of the way so that I can do something else while they dry.  Here they are with a coat of pale acrylic paint.


And if you do it on some card, you have the added bonus that you get a kind of stencil effect when you remove them - now I've got the quote in reverse should I happen to want it at some point!  Here they've also had Chipped Sapphire Distress Ink blended over the surface.


I stamped the scissors and thimble from the set on plain cardstock, "coloured" them with Pewter Distress Stain and then added a coat of clear embossing powder for added shine.  The little cotton reel is from my stash.  I wound some red thread around it, and gave that a quick wash of white paint too, to shabby it up (or down?!).


Thanks so much for stopping by today... it's great to have your company here at eclectic Paperie.  Do come back again soon; there's new inspiration every day from my fantastic fellow Design Teammates, so there's always something worth seeing.

Happy Crafting!
Alison xx

Wednesday, January 30, 2013

Guest Designer Post - Spring Flowers

Hi, it is Godelieve again, with two Spring cards.
This week I wanted to use the tape that Kim sent, and more buttons and Basic Grey paper.

 I used the Oh Christmas Tree stencil from Dylusions as a template to create tulips :)

 Tape, buttons, stitching and a Dymo label.

 The flowers are cut from Basic Grey paper.  I inked the edges with Distress Ink #Peeled Paint.

 And another card in Spring colors, with buttons as flowers, tape and stitching.

I used:
Basic Grey Paper Pad - Clippings
Buttons
Dymo Labels

This was my last blogpost as a guest designer for eclectic Paperie.
Thanks all for the nice comments on my cards.
And thank you Kim for asking me!

Tuesday, January 29, 2013

Product Spotlight - Tim Holtz Alterations

We're all about Alterations this week!  We're offering pre-orders on the products being released in February...and two "I Want it All!" deals on the dies and new Texture Fades!  Go with one of the "I Want it All!" deals and save 10% on all of the new dies!

You can check out the two deals here:

Dies Deal
Texture Fades Deal

And who can explain the new dies better than Tim himself!  I really enjoyed watching the videos listed below as Tim demonstrates all of the wonderful attributes of the new dies...I love how they work so well together!  **Please note that dies will be released in February, March, and April**  The dies currently listed in the store are for the February release.  The March release will be listed for pre-order as we get closer to the actual ship date.

Clipboard Die
Movers & Shapers
Texture Fades

You can see all of the Sizzix Alterations videos on Tim's blog, here.

Enjoy and happy shopping!

Monday, January 28, 2013

Be Original

Well I hate when I wake up in the morning and realize that it was my turn to post on the blog...and I failed to ever make a note of my posting date!  Whoops!!  It's a good thing I have a fun project to share this morning...or else I'd be putting off everything to create...hey...that might not be a bad idea...

Today's project is one that I taught at Wholly Scrap Saturday morning.  It's a fun mini album and you can take the basics of this project and apply it to any album and with any paper.

I started by grabbing a Maya Road canvas covered mini album, few TCW stencils, Spring Fling and Chevron, and Lemon Zest Dylusions Ink Spray.  I used the Spring Fling stencil for the cover of the album and the Chevron on the canvas pockets, included with the album.

Once the ink was dry, I got to work on decorating the cover.  I used a collection kit from Authentique (the Original line) to complete this album.  I love using the sticker sheets included in the collection kits. 

To decorate the cover, I used a #5 manila tag (stamped and embossed with clear embossing powder and then inked with Vintage Photo Distress Ink...use that blending tool to cover!), a canvas butterfly that I covered with Faded Jeans Distress Ink, some of the stickers, trinket pins from Maya Road, and a hand made dictionary paper flower.  Just layer all those pieces on the front and you're ready to go!
I used the Chevron stencil for the inside pockets and, like the cover, used a script stamp to randomly stamp the image in the few places on the front and back of the pockets.  Then I just added some stickers, rhinestones, and a punched butterfly.
The insde pages of the album were covered with paper (cover all your pages before doing any additional decorating or adding of embellishment), and then I came back and added additional paper strips, stickers, rhinestones, and more trinket pins.  I love those little word stickers that were added to the back of the pockets...
 I created a lot of paper banners for this album as well...I love lots of overlapping paper banners...so much fun!  More stickers and other embellies.
This last page is a lot of fun as I cut out of of the jean pockets from the paper, popped it up with foam tape, and added three tags to the pocket!  Fun, right?!  I also added some word stickers to the pockets and another paper flower.

To create the paper flowers (this is a Donna Marie flower, you can see her video here!), use a punch to cut out at least six pages of dictionary paper.  Crumple each piece into a little ball, un-crumple (technical term) each paper, layer, and use a brad to attach all of the layers together.  Then scrunch up each layer of paper for more dimension.  You can even ink the edges of your flower. 

Using a collection kit or any collection of paper, stickers, and embellishments is a great way to put together a quick and simple project!

Enjoy!

Saturday, January 26, 2013

You & Me against the world

You & Me against the world.  Hey there, it is Mary-Ann here, this is the perfect title in my house this week.  Ever have those times when you just have to pull together are count your blessings?  May times, they are right beside you.  I think this little sentiment will be encouraging to my husband Monday.  I am going to close it into his laptop and when he opens it, it will be a pleasant surprise!  It's better than jumping out of a cake!!!

The color pallet is soft and inviting.  It can be given today, or to your valentine.  There are endless possibilities to these nesting hearts.  I believe they will be holding glow sticks for Valentine's Day at school in a couple weeks!  The nesting hearts and sentiment are both from Wplus9 which can be purchased by clicking here.  Yes, they are perfect for Valentine's Day, but I can see them on a thinking of you card, a note to a friend, a card of encouragement or even on a scrapbook layout.  

I hope this card encourages you to send a note to someone important in your life today.


Friday, January 25, 2013

Sweet Girl Card

Hey Y'all!!!

Tenia here from Jazzy Paper Designs!! I have a super cute mini card for y'all today and it goes a lil somethin' like this.....CHECK IT!!!

I created this super cute mini card using The Sweet Stamp Shop-Sweet Tooth set, Memento Tuxedo Black Ink, Copic Markers and Peapod Twine by The Twinery!! Thanks for stopping by and have a great Friday!!!

Thursday, January 24, 2013

Completely In Love

eP011213

Hey there!  I pulled out some new Wplus9 Design Studio stamps and dies from eclectic Paperie earlier this week to create this sweet Valentine!  The stamps are the new Cupid’s Arrow set, and I also used the matching companion die to cut out the cupid on the upper left.  I saw this sample card made by W+9 design team member Jean Martin, and loved how she cut out the little banner at the bottom of the sentiment so it still fit the die-cut heart, so I stole her idea!  :)  I also added a little border at the bottom using the XO Border die… I just think that thing is SO cute!  The papers I used are Echo Park “Love Story”, and my pink ink is Ranger Picked Raspberry distress ink.  The large die cut hearts are from Spellbinders.

Hope this makes you feel all lovey-dovey!

eP Signature - Tammy Hershberger

Wednesday, January 23, 2013

Guest Designer Post - Hello

Hi!  It's Godelieve here with another guest designer post.
 On today's card I stamped a background with Wplus9 stamps, and combined it with Basic Grey papers from the 6 x 6 Clippings pad.

 Flowers are made from another sheet.  I love these papers.  Used it to cut the letters too.
I attached Basic Grey buttons to the flower centers.

Card base is inked with Distress Ink #Old Paper and an ink blending tool

I used:
Stamps:  Wplus9
Inkpads: Ranger Archival #Cobalt; Ranger Distress #Old Paper
Paper Pad:  Basic Grey Clippings

Tuesday, January 22, 2013

Product Spotlight - eKits

I've been all about eKits this past week...having created my own eKit mini album and sharing a wedding album eKit with a group of friends over the weekend. And today I'm excited to announce that we've added three new eKits to the store this week...one mini album kit and TWO card kits! Yippee!! I love card kits (oh, heck, I love all kind of kits!) because it's a great way to quickly and easily add to your card collection...allowing you to have cards ready to go for any occasion!

All of our eKits come with all of the supplies you'll need to create your project, along with color photos, and detailed instructions. The kits can be completed in two-four hours and all that's needed when you're finished are photos or stamped sentiments. Love that! eKits make wonderful gifts, either completed or as a kit, and are perfect for capturing photos from your favorite holidays or trips.

And, I have a little extra surprise for you this week. Since it can be challenging to see all that's included with an eKit, I made a quick video showcasing the Snapshots eKit contents, along with my finished project! I have to share that I am in love with the Snapshots kit...a seriously fun project! You can see the video in the eClassroom or by following this link.

Our new kits this month are...

Renew Card Kit (10 cards featuring, the Authentique's Renew paper collection)
Life of the Party Card Kit (8 cards, featuring the Basic Grey's Life of the Party paper collection
Merry Christmas Album Kit (6x8 album, featuring Simple Stories Snap Album and Handmade Holiday paper collection)

I've also added a fun paper kit, featuring paper and stickers from Authentique's Peaceful paper collection, to the Clearance section of the store. A boadload of paper and stickers for just $9.99!

All this week, purchase one of our eKits and save 10%! Just use code KIT10 when checking out...Enjoy!

Monday, January 21, 2013

Spellbinders Die D-Lites and Embossing Paste!


Good morning!  Sherry here today and I have an altered frame to share with you.

SCheeverRulesToLiveByAlteredFrame

I started with one of those $ frames from Michael’s.

BlankFrame

From thin chipboard a stencil was die cut using S2-020 Spellbinders Die D-Lites Medallion Five.

Stencil from Die D-Lite

Using the chipboard stencil and Studio 490 Embossing Paste, medallions were placed randomly around the bare wood frame.  Once the Embossing Paste was dry, the frame was painted black.  Antique Gold Rub ‘n Buff was used to accent the stencils.

SCheeverAlteredFrameTopRightFlower


The flowers, foliage and flairs were all die cut from 140 lb. watercolor paper.   (Video tutorial on the flowers can be found here - - Dimensional Blossom from Watercolor Paper.)  The flowers are S4-370 Blossoms Five, leaves from SS4-328 Foliage and S5-050 Rose Creations, and the flourish is from S5-119 Venetian Motifs.

SCheeverAlteredFrameSentiment

The sentiment is from an older Studio 490 set, Art-Fully Said.    If you don’t have the set and need it, please send Kim an email and she can special order it for you.  It was stamped on watercolor paper that had been misted and splattered with Broken China and Vintage Distress Inks, then die cut and mounted with S4-161 Labels One.

SCheeverRulesToLiveByAlteredFrame

Thanks for stopping by and joining me today!
eP Signature - Sherry Cheever

Project Supplies:

Sunday, January 20, 2013

Be Blessed

Hi everyone!  It's my turn to post on the eP blog today and I have a quick and simple card project for you today!  I was busy crafting all day yesterday but it's not a project I can share yet...ohhh...hate when I have to wait to share!  Be sure to stay tuned to this week's newsletter!  :-)
 
Today's card features the Spellbinders Poppy Patch die, which is one of the new D'Lites dies.  I love the intricate detail of these new dies and I thought all white would be a great way to showcase the detail.  Not much to explain about this card...it's all white, all the time!  However, I do want to share a tip about using the D'Lite dies.  Because of the small details on the dies, it's very difficult to remove the paper (after cutting) unless you use wax paper.  The pieces are just too small to easily remove. 
 
To quickly and easily solve the problem, lay a small piece of wax paper over your die and then lay the paper on top.  Run the die through your cutting machine and voila, the cut paper is easily removed from the die!  Fun stuff!
 
Hope you enjoyed today's very clean and simple card...sometimes you just need a quick project...and be sure to check out all of our D'Lites dies...eP offers special pricing on all D'Lites!
 
Happy Crafting!

Saturday, January 19, 2013

The Butterfly Experiment

Hi everyone,

Micki here to share my little experiment using the gorgeous butterflies from Balzer Designs Butterfly Stamp set and the coordinating 6x6 TCW stencil – Layered Butterflies. I already love using stencils and Embossing Paste. Totally love that technique but I have to admit that using stencils and acrylic paint is harder for me. I never seem to get a really clear design.
As you may know, I don’t let that stop me. Pure stubbornness . Before I share some of my “experiments”, here is the final result:


I started by using Dylusions Ink Sprays, randomly spritzing these onto the canvas.  Once dry, out came the Adirondack Paint Dabbers.  I wish I could say I had a "plan" but I really didn't.   I love creating backgrounds and tend to just play.  Keep your art journal or extra papers nearby to "clean" your brush or excess paint/ink off your project or Inksentials non-stick craft mat.
  
Next I started playing around with the  Layered Butterflies stencil and different tools to apply the paint; Adirondack Paint Dabbers, sponges, foam brush, paint brush were all tried and all yielded pretty much the same result.  (However, that could be due to user error) The butterflies on the canvas were done by using the dabbers directly to the stencil.  Once that was dry, I then took the matching Balzer Designs Butterfly Stamp and stamped the corresponding butterfly stamp over the stenciled one. 

In the picture above, the green butterfly was stamped first, then did the stencil and then stamped the outline stamp.
The green butterfly is ok, but I was not happy with the orange one or the purple one.  Notice the smeared edges of the purple one?

Definitely was not happy with the orange one either.  I got in a hurry and didn't line the stamp up correctly.  Now at this point I could have used gesso to cover it up and start over.

Instead I opted to use tissue paper.  Stamped the butterflies a couple of times, then cut them out.

I did a rough cut, not worrying about cutting exactly along the stamped outline.
Using Claudine Hellmuth Matte Multi Medium and a brush, I added these right over the original stenciled/stamped butterflies on the canvas.

While that was drying, I stamped the butterflies on my many excess colored tags, left over papers and colored chipboard coaster.

I ended up using the butterfly stamped on the chipboard coaster.  Because I didn't want the butterfly to blend into my very bright, multi colored background, I used my fingers to smear some Claudine Hellmuth Blank Canvas before adding the chipboard butterfly.

Then came the really fun part... adding texture using stamps.  I used Faber-Castell Gelatos with Claudine Hellmuth Studio Doodles Foam stamps. Apply directly to stamp and mist with water.

The paint dabber was applied directly to Honeycomb stamp from Market Street Stamps and then randomly stamped all over.


Next came Donna Downey's Inspire Words stamps from Unity.  The thing about canvas, I didn't like the brown ink, so I just used a wet wipe and erased it.  

Instead I stamped the words on extra left over inked tags/papers and cut them out.

A black marker was used to go over the butterfly outline


I admit, it's colorful.  The bright pink is bright, but considering I didn't pay any attention to colors, instead just getting lost in the moment of playing, the color combo isn't half bad.

Lots of playing and the one thing I learned about stencils and paint..... LESS is more. I used brushes, foam brush, stencil foam brush, cosmetic sponge and I actually had better luck using my fingers as the tool to apply paint over the stencil.  The other thing I learned..... smudges, irregular lines, smeared paint..... it's all good and oh so much fun!  And that is the important thing, right?!   Oh and now that eP shop has the PanPastels and the new (oooh giddy with joy) Tim Holtz Distress Paints, I see more "experimenting" in the future!

I hope you were inspired to get out your scraps, paints and just play! 

Supplies used: